Wednesday, 25 March 2015

Hop to it... Easter is just around the corner!

You'll know by now that I'm not a girlie-girl kind of girl so when I think of Easter and the Easter bunny my version has to be that of a black furred bad boy with a basket full of jewelled like eggs made of chocolate... very, very dark chocolate!


So for my first Easter tutorial I thought about making some ears... and yes, you guessed it they are black, though shock horror there is also pink glitter too!

Ha, OK so maybe I'm not that much of an anti-girlie girl after all but hey you can make your very own alternative bunny ears too by following my easy tutorial with your choice of colours.
Yes, pink glitter is optional!
Though I think a flash of colour is always great -it adds just the right amount of style!- having a solely black pair with black glitter will also look amazing!


This is what you'll need to make bunny ears just like mine:
Paper for pattern (for the ears)
black & pink felt
PVA or fabric glue
double sided sticky tape
glitter glue
fabric tape or ribbon
scissors
hair band
black thread, pins & a sewing needle


Step 1:
Add a section of double sided sticky tale to both ends of your hair band.
 Note: you can also add some to the middle for extra security....


Take some black ribbon or fabric tape and begin by folding over the base then wrapping over at a slight angle...


Continue to wrap the hair band completely until you've reached the other end...


You'll find that you might have to add an extra bit of tape or a dab of glue when you've reached the end. Fold over the tape to achieve a really nice and neat finish.


Step 2: 
Draw and Cut a bunny ear shape on some paper, then pin onto the black felt. Cut 2 shapes.
Cut 2 smaller shapes in pink - you can use a different colour! This will be the inside of your bunny ear.


Step 3:
Use some PVA or fabric glue and paste the back of the pink felt. Press firmly onto the black felt. Leave to dry for a bit.
Note: You can machine sew it on instead if you don't want to use glue. 


Step 4:
Take some glitter glue and generously cover the pink felt. Allow to dry completely.


Step 5:
Dab a tiny bit of glue on middle of the base of the pink felt and gently fold it inwards so it gives the ear a more natural shape.

Step 6:
Place a strip of double sided sticky tape on the base of the inside edge of the black felt ear shape.


Step 7:
Fold the base with the sticky tape over the hair band. Press tightly but gently so to glue it into place.


Step 8:
Sew the pinched area together to keep it together and also the base of the felt to the hair band.


Step 9:
You might want to give them a little jiggle on the back and sew a few stitches so they sit properly on the hair band...


And hey presto....

That's it!


Wear your Hare Band with pride, like a rockin' Easter Bunny!!!


X

Tuesday, 17 March 2015

Cut Out + Keep: Around the USA in 50 craft projects!

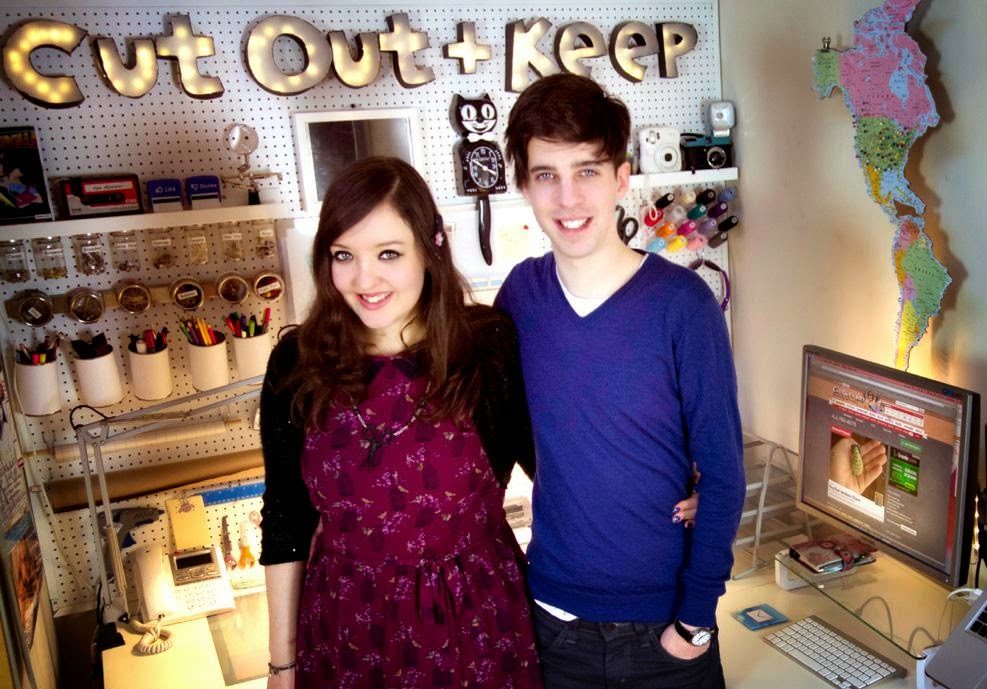
I had the privilege to meet Cat and Tom a while ago on the London craft scene. What struck me straight away was their amazing love not just for each other but also for the whole hand made movement!


This young couple is the driving force behind the on-line community Cut out + Keep and their immense talent and energy has made it a huge success not just with UK audiences but globally too!
Cat Morley started Cut Out + Keep as her craft blog while still at university.
In 2007, with her partner Tom Waddington, she turned the blog into a community website.
Their website receives a million visitors a month and now keeps them both busy full time.
I'm a huge fan of their web site so hearing the news that they had written a book filled me with great excitement!


Cat and Tom...  cute as a button and super talented too!
"Cut Out + Keep: Around the USA in 50 Craft Projects" is a more then just a craft tutorial book though... it's also a nifty travel guide and we absolutely loved reading it! 
Inspired by the extraordinary history and culture of this enormous and interesting country Cat and Tom created a selection of step-by-step projects which showcase the singularity of each state. There are also tons of recommendations of quirky places to visit too, plus plenty of photographs which add a lovely personal touch. You really get the sense that these two had a great time exploring and coming up with their project ideas. 

The USA divided in to easy to digest sections...


But it's not simply a diary of their hand made road trip through the States but also a great insight on their fun loving and warm personalities... plus the projects are easily achieved by anyone due to the clear and concise instructions.

The projects cover a full range of craft disciplines from knitting, jewellery making, paper crafting to even some Kitsch Americana inspired food recipes like the UFO cake pops. 
I can just imagine them camping out in Roswell holding a tray of welcoming treats waiting for our extra terrestrial friends to land!

Roswell inspired cake pops... just one of the quirky projects you can make too!

The premise of this book is pretty much my perfect idea of a great American adventure story!
It's Jack Kerouac meets Martha Stewart and if you were thinking of going on a great crafty adventure then this book will be an awesome companion!
I'm so proud of them and what they achieved here... and I love that they had such an amazing adventure.
They truly are an inspiring pair and I hope they continue offering such great projects like this book. Maybe on the next trip they can bring me along... I'd be a great roadie!


Are we back in Kansas Toto? Cute Dorothy shoe tutorial... I really have to try this one!


I love the personal touches... the tourist snaps and the intros to each section... it's pretty much like we were there with Cat and Tom!

"Around the USA in 50 projects" is a Laurence King title, published in February 2015.
You can buy it here! 

Monday, 2 March 2015

Guerrilla Bars, food for busy crafters on the go!!!

OK so how much fun would life be if we couldn't sometimes enjoy a little bit of what's "bad" for us?
Not very, hence why I added some chocolate to this otherwise very healthy recipe.
Well chocolate, especially dark chocolate, isn't really bad for you but if you add milk or white chocolate then you are adding extra sugars so that's what makes it "not so healthy" but we truly believe that a little bit of what's bad for you can also be good for you!

To make these Guerrilla Bars you'll need a few ingredients which you may have already in your pantry because of course fighting the war on tat is hard work so I'm sure you're larder is well stocked with edible ammo!
We know you need lots of energy to carry out your amazing tasks so we've used ingredients which are known for their slow release energy properties but also feel free to add your own twist to our recipe and... we're sure you'll love these as they'll keep you sustained during your crafty endeavours.
Enjoy craft lovers!

*For example you can add other ingredients like:
dried cranberries, dessicated coconut, raisins, other dried fruits or nuts of your choice, chocolate nibs (another super food) plus an extra yummy addition is to forgo the seed topping but instead add a layer of chocolate ganache. Ha, that's quite delicious but as you can see from our photos we've been good!!!


To make our Guerrilla bars you'll need...


  • 100 g  unsalted butter
  • 3 tbsp rapeseed oil
  • 50 g light brown sugar - note: feel free to cut back on the sugar and add less if you want a super healthy bar! Maybe add some naturally sweet fruit instead...
  • 3 tbsp clear honey *for vegans use dandelion syrup or golden syrup
  • grated zest of 1 orange 
  • 2 tbsp orange juice
  • 100 g dried stoned dates, chopped
  • 40 g walnut pieces
  • 40g chopped almonds
  • 250g porridge oats
  • 2 TBS hemp seeds
  • generous handful of dark chocolate chips- or push the boat out and add a mix of milk and white chocolate chips if you're feeling super naughty!
  • 30 g black sesame seed (for topping) or any seeds you like - pumpkin, sunflower, etc.
 
Method:

  1. Preheat your oven to 180ºC (350ºF // gas mark 4). Lightly grease a shallow non-stick baking tin. I've used a 20 cm (8 in) square tin.
  2. Place the butter, oil, sugar, honey, and orange zest and juice in a heavy-based saucepan and heat gently, stirring until the butter has melted.
  3. Remove the pan from the heat and stir in the dates, almonds, walnuts and hemp seeds. Then stir in the oats, making sure they are evenly coated with the butter mixture. 
  4. Leave to cool slightly and gently mix in the chocolate chips.
  5. Turn the mixture into the prepared tin, pressing it down firmly and evenly. 
  6. Sprinkle the black sesame seeds (or your seeds of choice) over the top and press down again so they are slightly embedded in the surface.
  7. Bake for 20 minutes or until deep golden around the edges. Remove from the oven and allow to cool slightly in the tin, then mark out 16 pieces on the top surface with a sharp knife. Once cooled completely and still in the tin cut along the marked lines.

NOTE: Don't be tempted to cut while still hot as it will crumble! Believe me I know through greedy experience!
You can keep these beauties for up to a week in an airtight container... though I doubt they'll make it past a day or so. I bet they'll be eaten before you can finish your yarn bombing!!!