Showing posts with label recipes. Show all posts

Thursday, 7 September 2017

Recipe: Vegan Super Snack!

Hello there craft lovers!
It's been quite a while... yup, we've been away from our lovely blog and it's not because we don't love you or that we've been lounging around in a tropical island... no, no, no... that would be amazing though not this time -maybe when we win the lottery!- but suffice to say we've had a busy old summer and because of it we're pooped! So much so that while we were thinking of ways of finding some extra energy that we came up with this awesome recipe...

Oh yes crafting and creating is hard work and we need tons of energy especially now that we're entering Autumn.
As the nights draw in and the warm sunlight fades we need to find energy in other ways and one of my favourites is through food.

And because we know most of you have also been super busy I'm sure you'll love this simple and quick energy rich recipe which we've developed here in our Craft Guerrilla kitchen. You could call them the Crafter's version of Scooby Snack and that's fine by us because they are packed with amazing super foods and nutrients... and just like that crime fighting mutt you'll be bursting with energy to get stuck in fighting to finish all those WIP's!
You'll be pleased to know that apart from the fact that these super snacks are healthy, tastefully packed with energy and are totally delicious... that they take under 10 minutes to make!Whoop, whoop!!!


So here's what you need to make our Craft Guerrilla Vegan Super Snacks:

  • 100g pecan nuts (or any nuts you fancy)
  • 75g soft pitted dates
  • 1 tbsp Agave Syrup (or maple syrup) 
  • 1tbsp Sugar free cocoa powder 
  • 1tbsp Chia seeds (you can replace with almond flour or sesame seeds or 50/50 mix of both) 
  • 2tbsp organic peanut butter
  • Desiccated coconut, cocoa powder or chopped hazelnuts to cover
This what you need to do to make them:
Blitz all ingredients in a food processor until you have a chunky paste. Don't over do it as you'll still want some larger nutty bits for extra texture.
Form into small golf sized bites giving them a gentle squeeze while rolling so they're nice and solid.
In a plate sprinkle some desiccated coconut (you can toast some for extra flavour) and roll the Super Snacks to cover them with lovely sweet coconut!
You can also melt some dark chocolate (the darker the better as you'll want very little or no sugar for this recipe) and dip them for an extra lush coating.
Pop into an air tight container and refrigerate, eat one whenever you need an extra boost of energy!
Makes about 10.

P.S. Don't be afraid to experiment with your ingredients! For example you can add matcha tea powder instead of chia seeds (but be careful, you'll need to add less matcha powder, maybe 1 tsp or it'll have a strong fishy flavour!) and replace the pecans with lovely pistachios and substitute the peanut butter with almond butter. It's all good just don't forget that the only "bad" stuff that we don't recommend adding is sugar... substitutes like dates, apricots and agave provide natural sweetness so go on, get making!


Monday, 31 October 2016

Flapjacks, a good old fashioned sweet treat... and not just for Halloween!!!


Spooktacular treats like Flapjacks are easy and inexpensive to make using cupboard staples and a healthier alternative to Halloween candy! Though I do like candy -a lot!-  I also love Flapjacks.... and they don't seem as naughty when you're consuming your own weight in them! Not that I'd advise anyone to eat too much sugar but if there's one day that you can go a little mad on the sweet stuff it's on Halloween so... you know, enjoy within reason!

So below is my basic Flapjack recipe which is super easy to knock up! It takes all of about 10 minutes and about 20/25 minutes to bake.

Note: You can omit the dried fruit and nuts if you wish but as it's Samhain I decided to treat myself to the max and added as much of the extras as I wanted. You can use the basic recipe and add your own twists like a caramel and chocolate topping or even add to the mix some coconut, banana chips and/ or chocolate chips!


Here's my Flapjack recipe: 
  • 150g butter 
  • 65g Light Brown soft sugar
  • 3 generous tbsp of Golden Syrup
  • 250g rolled oats (porridge oats) 
The extras...
  • zest of one orange
  • hand full of dried cranberries (or substitute for which ever fruit you prefer like figs, dates, apricots or mixed peel)
  • 80 grams of mixed nuts (walnuts, macadamia, pecan, almonds, Brazil nuts etc.)
  • 1/2 tsp of cinnamon 


Method:


Preheat the oven to 180C (160C fan) gas 4.
Grease and line a shallow 20cm square tin with grease proof / baking paper.
Put the butter, sugar and Golden Syrup into a medium pan and gently heat until melted. chop nuts and zest a large orange into the oat mix.
Remove the butter and sugar mixture from the hob and leave to slightly cool.
Stir in the oat mixture until incorporated.
Turn mix into the tin, level and press the mixture evenly and firmly with the back of a spoon.
Bake for 25 minutes, or until golden around the edges. Do not over bake or it'll become hard and quite dry.
Remove from the oven and cool on a wire rack still in the tin for10 minutes then mark into 12 or 16 pieces whilst still warm.
If you're adding a layer of chocolate topping remember to do so while the Flapjacks are still in the tin.
Cool completely before turning out onto a board and cutting again with a sharp knife.

Tuesday, 24 November 2015

Cinnamon biscuits? Hell yes!!!

Cinnamon  has to be one of my favourite spices... Warm, slightly bitter and deep... like a nervous "making-up" hug when you knew you were in the right but had to swallow your pride because you love them!
I've been baking and tinkering in the kitchen since I was a little girl. At the age of 10 I was given my favourite toy, a Betty Crocker Easy Bake Oven.


Yes thanks Betty, it was easy but also darn dangerous! The amount of times I burnt my arms removing the red hot cake tins from the oven are way too many to mention but hey, that was the 1980's so toy safety was a little bit different then but what it did was ignite my passion for baking!

The scars quickly healed but what baking gave me in return was worth every blister and burn!!!
You see baking always has a positive affect on my mood. So however down I feel taking time out to produce something sweet seems to put the world in order and my problems in perspective...
Baking can save us a whole lot of heartache plus the bonus is that you get to eat your way back to happy!


Having just returned from mum and dad's in the Algarve I thought it would be nice to share with you guys a great fuss free recipe of something I always crave when I go there on holiday.
So here's my version of the traditional Portuguese cinnamon biscuit which are more a mixture of cake and biscuit rather then a pure biscuit... they sit quite deliciously and contently between the two worlds.

I've added cardamon to add a Scandi flavour to them but for purists remove the cardamon from the recipe. You can also use butter for a richer biscuit but as I'm trying to go vegan I opted to use soya marg instead and it works pretty well. The result is a lighter, airier biscuit but still packed with tasty flavours!


Ingredients:
1egg
1 sachet of vanilla sugar or vanilla essence to taste

1 tsp of powdered cardamon
100g Sugar
110g room temp margarine
300 self-rising flour (or 300g of plain flour and 3 level tsp of baking powder)
Enough cinnamon to roll biscuits in

(makes about 20/24)

1. In a bowl mix the egg, sugars, cardamon, margarine and flour until you get a homogeneous dough. Don't overwork or the biscuits will be quite hard. You can use a food processor for this but I found it just as easy with a wooden spoon.

2. Cover and chill for about 30 minutes.

3. Roll into small balls -about the size of a chestnut. Dust a small plate with enough cinnamon and roll your biscuits in cinnamon until completely covered.

4. Place cinnamon balls on a baking tray lined with parchment paper, leaving some space between them as they will double in size if not more.

5. Bake in the oven at 180 ° C for 20 minutes.

Remove with the aid of a spatula and leave to cool on a wire rack.


These biscuits go really well with a cup of tea, chai or coffee! Personally I love them with a strong dark espresso... but I'll let you find your perfect beverage to go with these babies!


Friday, 26 June 2015

Get ready for the heatwave!!!

In the mid 1990's me and a fellow work mate discovered a bar in Soho called the Big Easy which made the most amazing iced cocktails.
This was our pre "hitting the town" place which we visited almost every Friday night and it was there that we fell in love with the Frozen Margarita!

Fresh, zingy, fruity and strong without being a knock out... it has just enough tequila to get you started for a long night of dancing!
I'm sure most people will have at least heard of frozen Margaritas, that's if they haven't ever tried one in one guise or another, but it's a classic which is a favourite in our house.
It's not only a thirst quenching frozen fruit based beverage but I'm sure it also counts as two of your five a day healthy eating fruit and veg deal! OK it's got watermelon and lime but it's got alcohol too so it's as healthy as it can be... and you know what they say "all things in moderation"!
So if you enjoy a little snifter but don't want to be legless then this is the one for you.
Please remember to drink responsibly and especially during a heatwaves you'll also need to drink plenty of water to keep your body hydrated.
This is also a great party alternative for anyone who doesn't drink but likes a pretty alcohol free cocktail to sip! 


Frozen Watermelon Margarita Cocktail recipe...though you can make all sorts of varieties including strawberry which is also delicious!

What you'll need:
A hand or cup blender
Ice cream maker / or a large heavy plastic container which is freezer safe and a fork

Ingredients:
Watermelon
Lime (about 4 if you are making a large jug for plenty of friends)
Sugar syrup -add 2 table spoons of sugar to 3 tablespoons of boiling water. Stir until completely dissolved and leave to cool.
Tequila
Rock salt (I used fleur de sel as it has a softer taste but it's still nice and salty!)
Still water


Instructions:
In a large cup place your chopped and deseeded watermelon and the juice of one lime, blend until smooth. I used a large wedge about 400grams of watermelon which will be enough to make enough granita for a large jug. Though please make sure it fits the capacity of your ice cream maker.
Add the cool sugar syrup and stir well. I purposely haven't added too much sugar as the watermelon I had was already nice and sweet!

Place the watermelon juice into the ice cream maker and follow instructions -you should have a granita setting or instructions in your product manual that will tell you how to do this.
On my ice cream maker it took only 10 minutes.
If you haven't one then follow instruction as above but place your watermelon juice in a large plastic container. Place in freezer, remove every couple of hours and using a fork lift up the frozen watermelon juice to form fluffy ice crystals until it's the consistency of a granita. This will take a little work but it's worth it!!!

Once your granita is ready and you're ready to make your cocktail place 1 measure of tequila per person/serving, the remaining fresh lime juice and top up with cold still water in a large jug and mix. The water will loosen the mix so it's ready to drink but don't water it down too much as you're looking for something that will slowly melt but is nice and thick too.

Take your cocktail glasses and gently squeeze a cut lime segment around the rim of your glass.
In a small plate place enough rock salt to coat a few glasses, turn your cocktail glass upside down and twist over the salt. The lime juice will serves as a glaze and will hold the salt to the glass. Even if you are having a virgin Margarita the salt is still a must... it really does help bring out the natural sweetness of the watermelon!
Pour into your cocktail glass, decorate with a couple of frozen raspberries, a sprig of mint and some cocktail umbrellas or colourful straws.
Cheers!


Monday, 2 March 2015

Guerrilla Bars, food for busy crafters on the go!!!

OK so how much fun would life be if we couldn't sometimes enjoy a little bit of what's "bad" for us?
Not very, hence why I added some chocolate to this otherwise very healthy recipe.
Well chocolate, especially dark chocolate, isn't really bad for you but if you add milk or white chocolate then you are adding extra sugars so that's what makes it "not so healthy" but we truly believe that a little bit of what's bad for you can also be good for you!

To make these Guerrilla Bars you'll need a few ingredients which you may have already in your pantry because of course fighting the war on tat is hard work so I'm sure you're larder is well stocked with edible ammo!
We know you need lots of energy to carry out your amazing tasks so we've used ingredients which are known for their slow release energy properties but also feel free to add your own twist to our recipe and... we're sure you'll love these as they'll keep you sustained during your crafty endeavours.
Enjoy craft lovers!

*For example you can add other ingredients like:
dried cranberries, dessicated coconut, raisins, other dried fruits or nuts of your choice, chocolate nibs (another super food) plus an extra yummy addition is to forgo the seed topping but instead add a layer of chocolate ganache. Ha, that's quite delicious but as you can see from our photos we've been good!!!


To make our Guerrilla bars you'll need...


  • 100 g  unsalted butter
  • 3 tbsp rapeseed oil
  • 50 g light brown sugar - note: feel free to cut back on the sugar and add less if you want a super healthy bar! Maybe add some naturally sweet fruit instead...
  • 3 tbsp clear honey *for vegans use dandelion syrup or golden syrup
  • grated zest of 1 orange 
  • 2 tbsp orange juice
  • 100 g dried stoned dates, chopped
  • 40 g walnut pieces
  • 40g chopped almonds
  • 250g porridge oats
  • 2 TBS hemp seeds
  • generous handful of dark chocolate chips- or push the boat out and add a mix of milk and white chocolate chips if you're feeling super naughty!
  • 30 g black sesame seed (for topping) or any seeds you like - pumpkin, sunflower, etc.
 
Method:

  1. Preheat your oven to 180ºC (350ºF // gas mark 4). Lightly grease a shallow non-stick baking tin. I've used a 20 cm (8 in) square tin.
  2. Place the butter, oil, sugar, honey, and orange zest and juice in a heavy-based saucepan and heat gently, stirring until the butter has melted.
  3. Remove the pan from the heat and stir in the dates, almonds, walnuts and hemp seeds. Then stir in the oats, making sure they are evenly coated with the butter mixture. 
  4. Leave to cool slightly and gently mix in the chocolate chips.
  5. Turn the mixture into the prepared tin, pressing it down firmly and evenly. 
  6. Sprinkle the black sesame seeds (or your seeds of choice) over the top and press down again so they are slightly embedded in the surface.
  7. Bake for 20 minutes or until deep golden around the edges. Remove from the oven and allow to cool slightly in the tin, then mark out 16 pieces on the top surface with a sharp knife. Once cooled completely and still in the tin cut along the marked lines.

NOTE: Don't be tempted to cut while still hot as it will crumble! Believe me I know through greedy experience!
You can keep these beauties for up to a week in an airtight container... though I doubt they'll make it past a day or so. I bet they'll be eaten before you can finish your yarn bombing!!!

Friday, 23 May 2014

Getting ready for SUMMER!

OK so you might be thinking to yourself that by using the "S" word that I'm acting prematurely (or jinxing it!) but as most Londoners will tell you we really can have the four seasons in a day so being ready for summer isn't necessarily a bad thing and lately it's been feeling quite warm so you know... lets keep positive and hope it lasts!


As a kid my cousins and I looked forward to my great aunties' picnic fare. She really is an amazing cook and made the most out of a very tight budget. I have to say that she was a magician in the kitchen. I must remember to ask her for a few of her recipes which work perfectly in the great outdoors!
And being outdoors is a great thing... so we really must make the most of it while it's hot warm.

And speaking of outdoors by far our favourite seasonal pursuit -apart from crafting in the sun of course!- is going to the park for a jolly old picnic where we can get a chance to enjoy some al fresco dining between the stitching and pasting... hopefully without the rain and the other remaining seasons thrown in!

So here's one of my all time favourite picnic recipes (sadly not one from my aunties' caché but still a good one!)... "Savoury French Cake"Ah Mais qui, cakes can be savoury too and this recipe serves as a great base which you can tweak and add other ingredients to make it your own. Try Smoked Salmon, boiled potato and dill for a fishy cake or a ham, pea, parsley and sun dried tomato loaf for a non veggie alternative.


Courgette and Goat's Cheese Cake... (V)
Makes one  loaf or about 10 mini cakes (muffin tray).

50g butter, plus a little extra for greasing the tin
1 small onion, peeled and finely chopped
100g plain flour
100g cornmeal or polenta
1 ½ tsp baking powder
½ tsp salt
½ tsp freshly ground black pepper
½ tsp smoked paprika
200g - or 1 of each of carrot and courgette grated
180g feta, crumbled in largish chunks... you want some bite so don't crumble it too much!
Handful of sunflower seeds
3 eggs, lightly beaten
150ml milk

Melt the butter in a small frying pan over a medium-low heat and sauté the onion until soft and translucent. Add the paprika, stir, then set aside to cool.
Heat the oven to 180C/350F/gas mark 4.
Butter a 1.5-litre loaf tin and line with baking parchment. Butter the parchment, too (you can also make smaller ones in muffin tins or mini loaf tins, in which case simply butter the smaller moulds and dust with flour so they don't stick!).

Stir together the flour, cornmeal, baking powder, salt and pepper. Mix in the cooled cooked onion, grated carrot & courgette, feta and sunflower seeds.
In a small bowl, whisk together the eggs and milk, then mix into the flour mixture until just combined. Pour into the prepared tin (or tins).

Bake large loaves for about 40 minutes or until the top is a nice golden shade, smaller ones for 12-15 minutes, until a toothpick or skewer comes out with no crumbs attached.
Leave to cool in the tin for five minutes, then turn out on to a wire rack to cool.
Serve warm with a mixed salad.

(Based on a River Cottage recipe)


Other savoury cake recipes:

Tofu and sunblushed tomato loaf
Tofu and sun dried tomato cake

Arugula and pine nut loaf

Smoked salmon and leek loaf  


Monday, 12 August 2013

Lemon ripple ice cream!

Well as it's still summer and the weather's feeling glorious we really wanted to post another ice cream recipe! Not that I need much convincing but I have to say that I'd never thought that I would make my own ice cream with such diligence!
The idea of having an ice cream maker at first made me think that it would become just another gadget sitting in the back of the cupboard... but far from it.
By having a little machine it's made it possible to experiment -as well as follow a few recipes- and it has been so much fun making up my own flavours. And one of my all time favourite -apart from chocolate of course- is lemon!
 Lemon is one of those flavours that you either love or hate. It's divisive but what you can't get away from is the cleansing and refreshing quality of lemons especially after a hearty meal so... this is just the tonic after a big eat! Though of course you can eat it on it's own and skip the meal entirely!

For this recipe I've added yogurt to the cream (a 50/50 split) as I wanted it to be less fatty then others made with just full double cream but it's still smooth, rich and packed full of flavour.
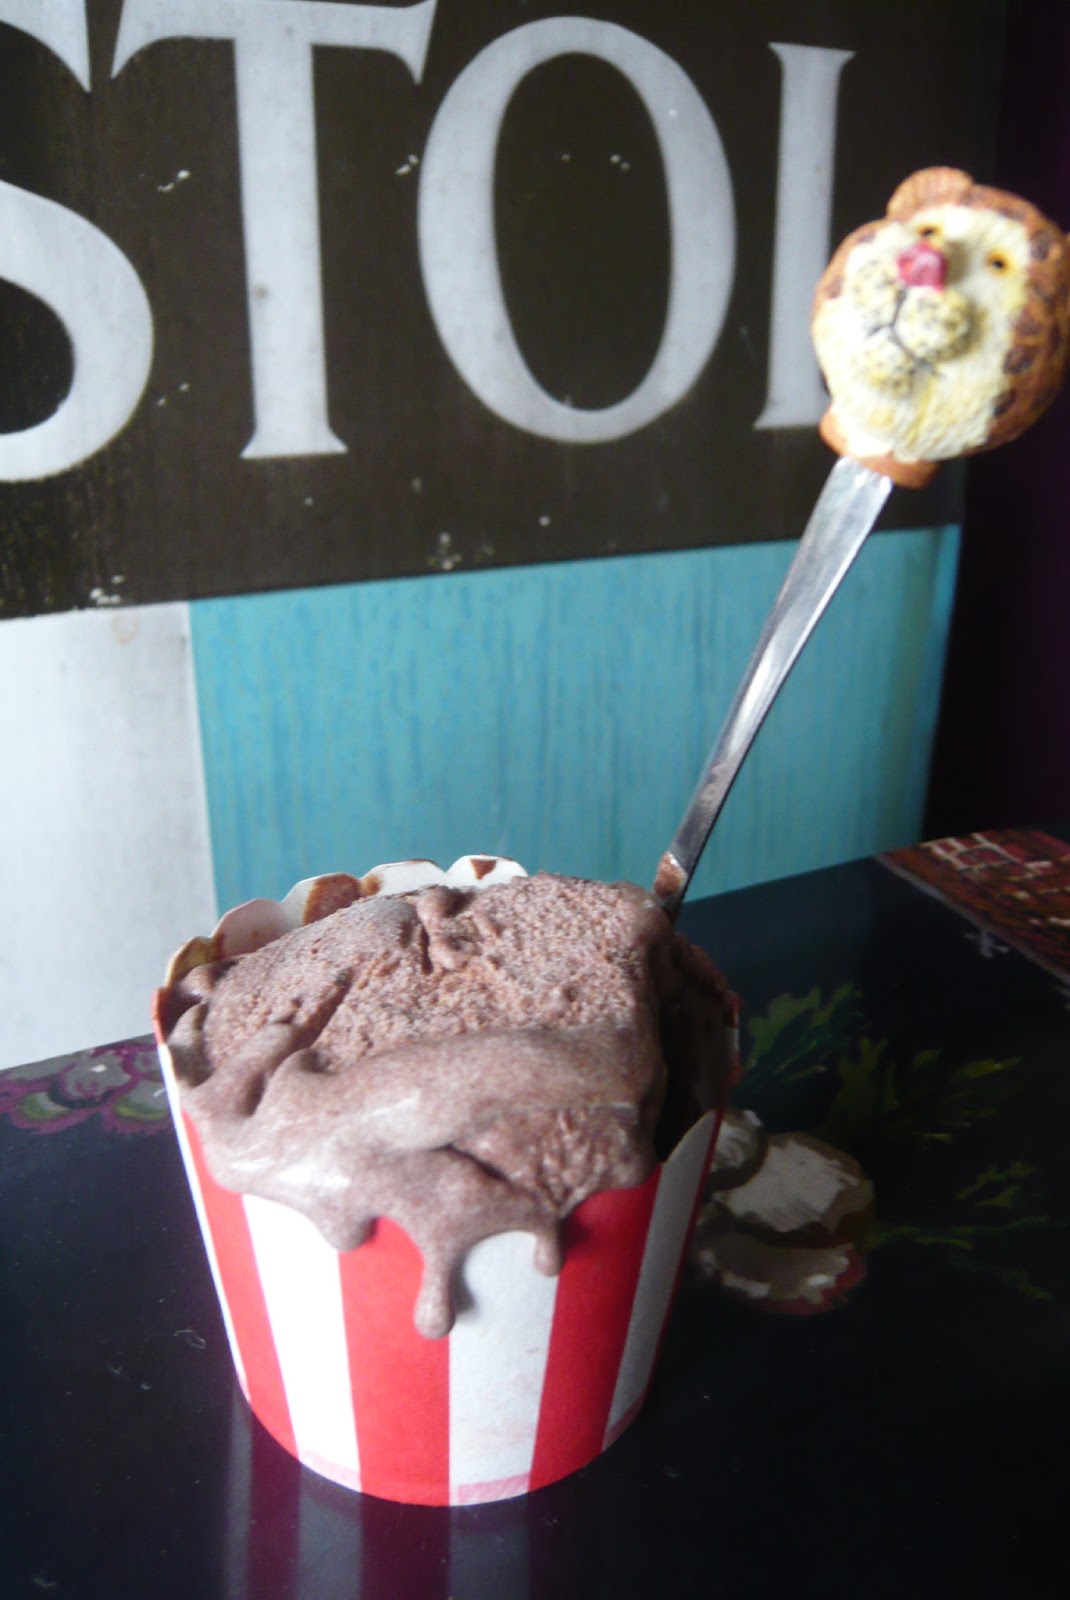
You can't see it in the photo but there's a "vein" of lemon curd running through it and lots of zesty lemon which looks inviting and yummy! A jolly, bright, mellow yellow treat for all...

Ah Lemons... use the best quality ones you can find/afford. Preferably Sicilian lemons would have been used but these are run of the mill veg market fodder but the ice cream still tasted amazing! I'm going to try this recipe again when I visit my mum as she has an amazing organic lemon tree in the garden...

For this recipe you'll need:
An ice cream maker; fear not if you haven't got one you can slightly adapt it so it can go directly to the freezer! I'll add the directions as we go along...
zest and juice of 2 lemons
100g of icing sugar
300ml of double cream -for straight to the freezer use whipping cream-
300ml of honey Greek style yogurt
3 tbsp of lemon curd

The ice cream maker method:
In a large bowl which all the ingredients together. Add to your ice cream maker and leave to thicken. In mine it took circa 30 minutes but please refer to your maker's manual.
Right at the end add the curd just so it ripples but doesn't  mix in completely. Transfer to a freezer safe container.

The freezer method:Whisk the whipping cream until it forms soft peaks. Add the sugar, lemon zest and juice to the yogurt and mix well. Take a small amount of your yogurt mix and add to the whipped cream so it's incorporated. Now gently fold the remaining yogurt making sure not to knock out too much of the air from the whipped cream.
Add the curd and mix just so it ripples but doesn't  mix in completely. Transfer to a freezer safe container.
Leave for at least 4 hours to set. Remove a few minutes before serving.

It's also a great base for smoothies and shakes... add fresh berries and whiz to make a refreshing summer drink or spooned over home made meringues with a generous sprinkling of flaked toasted almonds for a gorgeous desert...

We'd love to know what you think and if you've tried this recipe let us know.
Share your ideas, tips or how you've adapted this recipe to create your own in the comment section below... we'd love to try your recipes too!!!

Monday, 29 July 2013

D.I.Y. Beauty... get ready for summer!

Living on a shoestring budget shouldn't mean that you need to go without a bit of pampering. Spas are wonderful but a bit too pricey for me at the moment as are expensive shop bought treatments but I'm in need of some TLC!
Many people think that more expensive means better... maybe so in some cases but not necessarily true when it comes to buying beauty and grooming products.
For a long time I've made my own face creams and other concoctions like hair rinses, hair masks, bath oils and so on mainly not out of necessity but because I wanted products which were purer and without additives or harsh chemicals.
And after this long hard winter we've just had my face is in dire need of attention!

Feeding your skin can be easily done with something as simple as mashing avocado, honey and essential oil together which makes a refreshing face mask or for tired hair rinsing your mane with a bottle of stout is a magical treat!
By rinsing your hair with stout in addition to adding B vitamins, the proteins found in malt and hops are said to repair damaged hair and boost the overall body of your neglected locks. Also the maltose and sucrose sugars in beer tighten the hair's cuticles so expect an enhanced shine like that of the wig of a Hollywood superstar... It's true!

Scrambling around in the Craft Guerrilla cupboards we found everything we needed and I'm sure you'll have some of this stuff in your homes too... Maybe not the green clay but I implore you that if you haven't some already to invest in it...it's a really good staple for so many treatments!

And because we love making our own so much here's the recipe for our latest home beauty fave... detoxing face mask! In the words of Mrs. Doyle "Go on, go on, go on" Give it a try!

Cupboard love! Inexpensive ingredients that you might have in your home...

A very important note: Because the clay draws out any impurities your face may go red and blotchy - mine did- so if you're planning a big date, job interview etc... do this at least 4 hours before your big meeting or preferably the day before!

Ingredients:
1 large heaped table spoon of fine green clay
Essential oil, you can use one suitable for your skin:
normal 1 to 3 drops of Lavender essential oil
greasy 1 to 3 drops of lemon or grapefruit essential oil
dry 1 to 3 drops of Mallow Leaf or Sandalwood essential oil
1/2 tsp of honey
1/2 tsp rose water
Pulp or gel of a freshly cut Aloe Vera leaf - if you have any available, we have a monster of a plant!- or a tea spoon of olive oil
distilled water

(NOTE: this will make a large amount so if you want to keep it for a week or so add one teaspoon of citric acid, a drop or two of vitamin E and store in the fridge... better still share with a girlfriend or a family member!)


Utensils you'll need:
1 wooden or plastic spoon (metal reacts with the clay therefore diluting the potency of the clay)
1 ceramic or plastic bowl
1 large soft bristled brush
1 soft brush to buff the skin prior to treatment

Here's how...
Mix all the ingredients together to form a silky and smooth paste which should resemble cake batter. Add the water a little at a time as you don't want it too runny.

*Extracting the Aloe Vera gel can be done by scrapping the inside of the tender leaf... it does resemble snot but it is absolutely amazing stuff!
Plus you can keep any unused leaves in the fridge as long as the cut part of the steam is covered with a paper towel or cling film. If you don't have an Aloe Vera plant you can use as stated previously olive oil instead!

Fresh Aloe Vera Gel extracted from leaves of a mature plant! Ours came from Spain as a little bub. It's now 18 years old and growing!
Scrape out the "gel" with a sharp knife...

Before you start treatment...
Massage your face with a soft brush (a baby's hair brush is awesome but a tooth brush you keep solely for your skin can be just as good) this will wake up your cells and get your system ready to receive the healing face mask!
Now you're ready to start the fun part...

This is the consistency you're aiming for...almost like melted chocolate or cake batter!

Apply enough clay to your face- paint it on generously- but avoid the eye and lip area. You should have an even coverage but don't be tempted to layer it on too thick!

Paint it on!
Leave to dry completely for about 10 to 15 minutes and wash off with warm water and pat dry. Make sure to not get any in your eyes...


Try not to speak or laugh... the lesser cracks the better!
Once completely clean and dry apply a light face cream or massage a bit of extra virgin cold pressed olive oil onto your newly invigorated skin! Also if your skin is a bit red you can apply some Aloe Vera gel which will calm down the redness.

For an extra bit of love get those cucumber slices on your eyes, sit back, relax and enjoy!

P.S.
My skin went super red -as you can see- but it was clear and glowing plus the redness went down pretty quickly... it had been a while since the last time I did a face mask so my skin was in terrible need of a "deep cleansing".
Your face shouldn't go red because of the clay but it's usually down to the toxins and/or can be hormonal.
It has been known that even people with normally "great" or "flawless" skin get breakouts after green clay face masks so don't fret... it's nothing bad or permanent it's just your skin getting rid of any horrible nasties from your body!


Friday, 26 July 2013

Bake it yourself!

I'm not one to shy away from cake... not even in the summer! I know that it's one of those comfort foods that people usually enjoy in the cooler weather with a cup of tea or even coffee... but you really do not need to twist my arm!
It's true that cake does taste better when it's not so hot, well I think so, but on the other hand I've never let the weather stop me from eating a slice (or two) however actually baking it is another story.

Pardon the pun but it's baking hot and turning on the oven in such ghastly heat isn't really something I look forward to but with this recipe the oven isn't on for too long. Phew!
For a truly quick summer bake I've gone for soft, gooey, chocolate rich brownies, the perfect accompaniment to our previous recipe for chocolate ice cream!

The magic with brownies is that the whole process is super quick - actually they taste better a little bit undercooked- and the ingredients are super quick to measure up, put together and slap in a tray! That's pretty much it and as long as you are organised -yes having ingredients at hand does help- and you follow this recipe then you'll be in and out of the kitchen in about 10 minutes.

I say whip it, whip it real good! Thank you Devo... but yes a good old MIX will do!

Pour into a pre lined baking tray...

Yummy dark and rich and ready to be baked!

After 30 minutes... hey presto! Cooled and ready to cut...


Dense, moist and very rich! I would remove them a bit earlier next time...


Because we love to post "healthier" versions too we're baking a gluten free version... and because I accidentally ordered a huge bag of fine corn meal (slightly coarser then corn flour) in my weekly shop I've been looking forward to trying some recipes which use alternatives to wheat flour.  So a great treat for wheat intolerant greedy guts (like me) and/or suitable for ceolics as it's gluten free!
I've gone for a straight up neat brownie mix but you can definitely experimenting with additional ingredients like dried cherries, almonds, pistachios and any other stuff you like. For example I quite like adding fresh blueberries and chopped Brazil and Hazel nuts for a cake version of a Fruit & Nut bar!

So here's what you need:
  • 80 grams of softened unsalted butter
  • 1/2 cup fine corn meal
  • 1/4 almond flour/almond meal meal
  • 1/4 cup baking cocoa
  • half a teaspoon cinnamon (optional)
  • half teaspoon salt
  • 200 grams of dark chocolate (either in chips or broken in smaller chunks)
  • 1/2 cup sugar (I used half caster, half brown sugar for a deeper caramel taste)
  • 1 teaspoon vanilla
  • 3 eggs
  1. Preheat oven to gas mark 6.  Line an 8 inch pan with parchment paper and set aside.
  2. In a bowl sift together the corn meal, the almond flour, cocoa, cinnamon if using, and salt. Set aside.
  3. In a microwavable bowl combine butter and the chocolate chunks.
  4. Melt in microwave stirring every 30 seconds until melted and mix well. You should have a smooth, thick mixture. Leave to cool slightly.
  5. Beat the eggs. 
  6. Stir in the sugar, vanilla, and beaten eggs into the melted chocolate mixture.
  7. Add the corn meal & cocoa mix into the melted chocolate mixture and stir until well combined.
  8. Pour batter into prepared pan and bake for 25-30 minutes.
  9. Remove from oven and let cool completely. *You can refrigerate before actually cutting them as they'll be much neater though you can remove from the tin and leave to cool slightly and cut while still warm.
Happy baking!!!


Friday, 12 July 2013

Something for the weekend... make your own Ice Cream!

Finally the hot weather has arrived and London is prettier for it... so many gorgeous people in gorgeous summer frocks (and the boys look pretty awesome too... but not in frocks though!), it really is something quite extraordinary but the best accessory by far is some home made ice cream! But don't wear it... As I can confirm it is quite a task to remove a chocolate ice cream stain from a dress!

Because we love trying new things and as I am "babysitting" a friend's ice cream maker I thought I'd give it a go! I was thinking of trying a few fruity ones but in this household chocolate rules and so... I complied and made some super chocolaty stuff courtesy of the fab cook Hugh Fearnley-Whittingstall.
I have to say that it got a huge thumbs up! Easy to make - even though I was slightly in a flap when I read the part of making a sugar syrup but it was more straight forward then it looked - and is so delicious... it's pretty close to a certain Danish Ice cream company but...better!!!
Though to me it was super duper it needed to pass my fussiest taste tester's approval which it did, he actually said:
"Wow, it's like eating frozen chocolate mousse!"
And if the other half's happy with it then mission accomplished so I highly recommend this recipe...
http://www.bbc.co.uk/food/recipes/superrichchocolateic_14295 

Easy Tiger, there's enough for everyone!
Plus as I had a bit of mix left over - it wouldn't all fit in the churner- which means the old noggin started to work overtime!
I couldn't just chuck it away so I thought about experimenting with it and as it had eggs and butter it was a perfectly good cake base so to the mix I added 2 table spoons of self raising flour. The consistency should be like that for a sponge cake mix but still quite runny.
I trialed one straight away and it was pretty good though what I found next would completely change the recipe and I can confirm that it's well worth the wait! The first trial was good... it was more of a gooey sponge cake which hey... I still ate and enjoyed immensely but take it from me be patient and it gets better!
What I found is that if you let it set in the fridge overnight that it becomes more of a souffle, chocolate fondant type of dessert and that is absolutely a winner with me!
So what you'll need to do is: fill your ramekins about 3/4 of the way, cover with clingfilm, leave over night in the fridge to set then zap in the microwave for 15 to 30 seconds (if you're making 2 at a time and you have an 800 W microwave it'll take circa 30 to 45 seconds).

Let's just say that it blows all those "cakes in a mug" recipes out of the water... kind of reminds me of the Gü Desserts souffle pots! Warm, gooey, super dark chocolate heaven which will go amazingly well with the above mentioned ice cream... though you might go into a chocolate coma! Oh well... it'll be worth it!

Thursday, 4 July 2013

Something for the weekend!

As summer strides past it's middle... er yes, that's right, we've gone past midsummer and even though it hasn't felt all that summery... the great thing about this season is that it does throw us a few bountiful treats and if you're anything like me you'll be happy to hear that those treats can be foraged for free!

Yup, absolutely free though I do suggest that you check if anyone owns the land especially f it's not obviously public land, but everywhere I looked there were tons of elderflower trees and so I took myself up to the Walthamstow Village cemetery and began picking!

Walthamstow Village...ST Mary's Church cemetery. Great for Elderflower and blackberries too!
So this weekend get out there and get ready to make some cordial which is an absolute summertime treat! Use it with soda water to create a refreshing drink or drizzle onto ice cream, desserts or even in cocktails. Yeah... that's pretty much why I made it... I do love a cocktail and a white rum and elderflower cordial punch is something I'm looking forward to drinking when it gets hot!!!
So here's a little recipe for you to try...


Elderflower Cordial...

prep time 40 minutes

steeping time 48 hours

ingredients:
  • 1k /2 ¼ lbs sugar
  • 1.5 litres / 6 cups boiling water
  • 2 medium un-waxed lemons, washed
  • 2 large limes, washed
  • 30 large Elderflower heads, shake to remove any insects or dust
  • 55g / 2 oz citric acid (available from a chemist or Wilkinson's in their home brew section)

 Recipe:
  • Place the sugar into a large saucepan/stockpot or a large heat proof bowl. Pour the boiling water over and stir until all the sugar has dissolved. Leave to cool.
  • Grate the rind of the lemons and the limes with a fine grater, add to the sugar water.
  • Slice the lemons and limes into thick slices and add to the water. Add the citric acid and stir, then finally add the flower heads to the water and stir again.Remove as much as the stalk as you can.
  • Cover with a clean cloth or lid and leave to steep for 48 hours.
  • Strain through clean fine muslin cloth into a clean bowl.We've used a colander with a jiffy cloth and strained it twice into a measuring jug to remove any bits.
  • Using a funnel, fill sterilised bottles (see note below). Seal and store in a cool, dark place (not the refrigerator) for a few weeks or freeze in plastic bottles to keep for longer (see note below).

Pick large heads which are in full bloom...


It's really easy to make and I for one am converted to making my own cordial now. In previous years I had thought it might be too complicated to make but as you can see from the recipe it's super easy. I'm planning on going to get some more so I can make some Elderflower Liqueur also there's another variant I want to try... I hear that if you add a couple of teaspoons of lavender flowers that it's even more yummy! Can't wait to try!!!


Doing the taste test!!! Mix with water to your own taste... we like it strong with plenty of rum though this one in the photo was just with cold spring water!

Once bottled keep your brew in a dark cool place preferably out of the fridge! We've added a brown paper label to help keep the light out...
Note:
To sterilise your bottles wash well with soapy water then dry in a medium/hot oven (gas mark 5 or 6) for about 10 minutes.
To freeze your cordial either fill ice cube trays or if you're freezing it in a bottle make sure to leave plenty of room as the liquid will expand during freezing.

The best way to pick your elderflower heads is to do it on a dry warm day as you want them to be at their most fragrant. Also make sure they are away from any busy roads as the elderflower tree will soak up all the nasty car fumes... yuck that's something you really don't want to bottle and drink!


P.S. Please forage responsibly. Even though we love free stuff we're also aware that nature also needs these Elderflower to feed all the beasties who are dependent on it for food so please pick only what you need!


Saturday, 30 March 2013

Happy bunnies eat sweet brioche!

Craft Guerrilla gals (and guys) love to bake! It's a creative outlet so it's very much a weekly happening in CG Towers... plus we are pretty greedy too!
Mostly we are kept busy with crafting but we definitely always find time to bake! It's amazingly relaxing and also you can eat what you make which isn't possible with craft...ew, woolly pompoms are not tasty!
For Easter we've decided to try to bake our own French brioche loaf. Yummy, soft, sweet and heavenly served with lots of butter and jam...the perfect Easter weekend breakfast though we advise you to eat it as often as you like and not just for Easter! Somethings should be enjoyed more then once a year!!!
Having never attempted to make brioche we began with mild trepidation though with the aide of a bread machine it was simple and super quick! There are so many myths about brioche making but after trying this recipe I can truly say, hand on heart, that it isn't that difficult. It takes a little time but all good things do so... Try it, you won't be disappointed.


For two Brioche loaves you'll need...
ingredients:
     550g flour
     125ml of milk
     2 tbsp. creme fraiche (or buttermilk)
     2 eggs, beaten
     1.5 tsp. teaspoon salt
     110g of sugar
     110g unsalted butter
     1 tablespoon rum
     1 tablespoon orange blossom
     1 tsp vanilla extract
     25g fresh yeast


Place ingredients in your bread machine in the following order: milk, creme fraiche, eggs, salt, sugar, rum, orange blossom water and vanilla extract. Cover with flour. Dissolve the yeast in a tablespoons of water and pour over the flour.
Start your machine on the dough program. All machines vary time wise so please refer to your handbook to check the timings of your dough cycle as you'll need to add the butter half way through.
Once your machine is half way through the kneading cycle add the cubed butter which should be cut in smallish cubes. Add a tablespoon at a time so the machine can kneed it into the already mixed dough.
At the end of the program, remove the dough from the machine and divide it into two.(NOTE: You can do this by hand too once the dough cycle reaches the end. If you are doing it by hand knead just so the butter is evenly marbled through the dough but don't over knead it. You should be able to still see chunks of butter in your dough.) 

Form two braids and arrange on a baking sheet covered with parchment paper. Let rise for about 2 hours. Preheat oven to 180 ° C. Brush loaves with beaten egg
Bake for about 25 minutes.
*TIP: we used two silicone loaf molds just so to keep them tidy but you can bake them straight onto a floured oven tray!

(recipe taken from:http://delicesdhelene.over-blog.com/m/article-21710631.html


Enjoy toasted with lashings of butter and jam and a large bowl of café au lait

Happy Easter Craft lovers!


Do Make Say Think - Horns of a Rabbit from Sean Plaice on Vimeo.

Wednesday, 12 December 2012

"Kanelbullar" ...my current obsession!

I love Swedish cakes and these are my current obsession...once you've tried making them you'll know why! They are super easy to make and most importantly they are delicious!
So without further ado here is the best ever recipe for Swedish "Kanelbullar" that I've ever found. They yield a large number so what I did was half the recipe though as it takes 1 egg I left it as it is IE 1 egg and it was fine...all other ingredients where halved and the result perfect!


"Kanelbullar"
Scandi Kitchen recipe:
Makes around 40 buns
For best result, don’t be stingy with the filling and don’t try to use low fat anything: whole milk, good quality butter... 
We also prefer using fresh yeast, but if you can’t get hold of any, you can use dried. NOTE:Replace fresh yeast with 2 x 7g sachets of the instant dry yeast – and add this to the flour/dry ingredients and NOT to the wet mix. 
If you are new to cinnamon buns, don’t worry: there is a lot of cinnamon in these – and ground cardamom. You can hold back a bit if you are not sure you’ll like it as strong as we do – but remember... they’re called Cinnamon Buns for a reason.

The dough
50 g fresh yeast
1000 g plain bread flour
85 g caster sugar
1 egg
150 g unsalted butter
500 ml whole milk
½ tsp salt
1 tsp ground cardamom (optional).
Filling
150g butter (nice and soft)
4-5 tsp ground cinnamon
85 g sugar (we like to use brown sugar)
Decoration
1 egg for brushing
Around 100 g of pearl sugar for decoration or drizzle over a thick icing sugar and water glaze...I actually prefer this to the pearl sugar!
 
This is how you do it
Melt the butter and add the liquid (milk) – check the temperature (should be between 37-46 degree Celsius for optimal yeast).  Add the yeast and stir.
Once the yeast has dissolved, add the egg, sugar, salt, cardamom and most of the flour (hold a bit back for kneading, about a large hand full). Work the dough until it stops sticking and has a shiny surface – probably around 10 minutes by hand. Keep kneading, it makes for a better bun.
Please the dough in a nice warm place for around 30 minutes or until doubled in size. Place the dough on a floured surface and work through the rest of the flour. I actually used a large floured melamine tray so to contain the mess!
Cut the dough in half and roll out each piece in a rectangular shape, around 30 cm long and 12-15 wide. Butter the whole piece liberally and dust over with the cinnamon and sugar. Roll each piece lengthways so that you end up with a long sausage looking roll. Cut 2 cm big bites and place them carefully on baking trays (take care to keep them separated as they will rise).  
Let the buns rest for another 30 minutes until doubled in size.  You should get between 34-40 buns out of this batch.
Brush gently with egg and pour over a bit of pearl sugar on each bun and then bake in the over on 220 degrees (fan oven) for about 8-10 minutes (turn the heat down a bit half way if you feel they are getting too brown). Let them cool down under a clean tea towel – this will stop them going dry immediately.
If you are using an icing sugar glaze (which I've been told the Norwegians prefer) allow the buns to cool before drizzling!

Enjoy!!!

PS You can always freeze them and defrost by gently heating in the oven as they are best served warm. 
If you make a whole batch I doubt you'll have any left over but freezing is great especially if you need to have them on hand for a quick sugar rush! 


NOTE:
I found fresh yeast in the Polish shops. Very inexpensive (about 40p per pack and you'll get at least 2 servings from it) and it's great quality.